Wednesday, February 27, 2013

A.B Young Trail to East Pocket Lookout


A hiker from Sedona who claimed to know how to reach the site of the Vultee plane crash by way of A.B. Young Trail, agreed to lead a hike to it. Having long been somewhat curious as to exactly where the plane crashed and not having hiked A.B. Young since October 2009, we scheduled a hike for 27 February 2013.

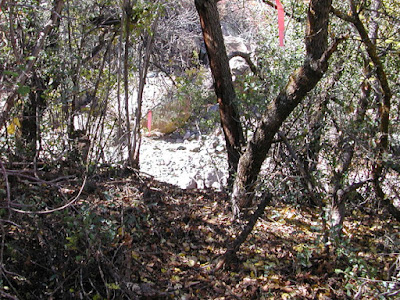
On the appointed day, we traveled north on 89A through Sedona and parked alongside the highway about 150 yards north of the entrance to Junipine Resort (located about half way between mm 382 and 383). We walked back to the resort entrance and proceeded on the main road through the resort for about 100 yards until we came to a small sign pointing to a walkway leading down toward the “creek.” The photograph shown here (right) shows Dolly Yapp emerging from the walkway on a 2009 hike.

The walkway brought us out on a street below headed directly to a bridge crossing Oak Creek. The bridge is shown below in a 2009 photograph.

Bridge across Oak Creek at Junipine Resort – October 2009
Directly across the bridge an unnamed trail leads upstream along the bank of Oak Creek to A B Young Trail, about 0.42 miles ahead. The trail sign shown here (left) points out the start of this trail. The photograph was taken on our October 2009 hike.

As we walked upstream alongside Oak Creek, we noted the remains of an old irrigation system. In places along the trail, we encountered communications cables strung on short poles over the trail, in some areas low enough that one needed to duck to avoid touching them. I call them communications cables because I assume that no one would install power cables so low along the trail.

The junction with A B Young Trail was clearly marked when we came to it. In the photograph shown (right) here the trail leads to the left up the mountain. The trail leading to the right continues along Oak Creek to a very difficult crossing at a parking area alongside 89A. We crossed there to hike on this trail several years ago.

An old, rusty metal sign, barely visible in the top of the above photograph, reassures the hiker of being on the right trail. To this point, the hike has been along a relatively level trail. It now starts to climb, at first rather gently, rising some 200 feet in the next two-tenths of a mile. After that it rises very rapidly along a series of switchbacks to the top of the mountain.

We made our way up the switchbacks, pausing occasionally for a breather and soon were high enough that we had excellent views down into Oak Creek Canyon. The following two photographs will serve to display the view and to contrast the differences between what we saw on this February hike and our October 2009 hike.

Oak Creek Canyon from A.B. Young Trail in February 2013
Oak Creek Canyon from A.B. Young Trail in October 2009
When we arrived at the top of the mountain we found about 18 inches of snow on the ground and I began to doubt that we would find the wreck site. Even finding the trail, now obscured by the relatively undisturbed snow, was a bit difficult in places. Nevertheless, we pushed on, climbing the relatively gentle slope to the crest of East Pocket Knob where the tower is located.

On reaching the tower, I noted that considerable work had been performed on it since 2009. It was not manned at the time of this visit; however, we were able to climb most of the way up (only the top level was locked) to get a better view of the surrounding area. Going on past the tower for a hundred yards or so, we found picnic tables and benches placed at the end of Forest Road 231. I paused there and sat on one of the tables to look back and photograph the tower.

East Pocket Lookout Tower – February 2013
The wreck site is said to lie down the slope to the southwest of the tower and, along with the rest of the party, I did go a short distance in that direction. But it was immediately obvious to me that, with landmarks obscured by the snow and no specific coordinates for the location, we would never find it. I decided to save the search for a summer day on which I could drive in on Forest Road 231, perhaps stop for a picnic, and do a more leisurely search.

I turned back to the picnic tables and just enjoyed the scenery while I waited for the other members of the party to return. Looking up, I found that barren tree branches above me were most attractively outlined against the blue sky and took several photographs of them. The one I like best is shown below.

Barren branches against the sky
Even though I was surrounded by snow, the sun was warm and I began to think of a noontime nap. Looking around, I found a nice pile of broken tree limbs and other debris that had been cleared from the picnic area and managed to make myself a rather comfortable nest in it. That is where I remained until the rest of the party returned.

We all agreed that a summer expedition to find the crash site would be more appropriate and headed back down the trail, pausing along the way at the “throne.” This is actually nothing more than a stump where a tree was cut down and fell before being sawed all the way through. The unsawed part of the trunk split away and left a shaft of wood on the stump extending several feet above it. The stump with that shaft of wood still standing makes a good chair, or “throne.” We stopped and coaxed Mary onto the “throne.” George immediately declared her Queen Mary and proclaimed himself to be a knight of her realm.

Queen Mary” and “Sir” George
The elevation gain for this hike from Oak Creek to the lookout tower on East Point Knob was just over 2100 feet. The total hiking distance from where we parked to where I gave up searching for the crash site was 3 miles, making my round trip hike 6 miles.

Our GPS track is shown in red on the included map (below).

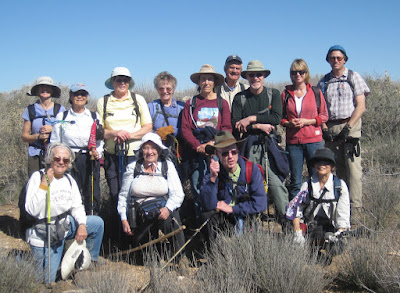
Participating in this hike, in addition to the author, were: Frank Lombardo, Becky Fowsky, Mary Gavan, George Everman and Jim Manning.


Saturday, February 23, 2013

Quail Springs Ranch Road to Allen Spring


Fourteen Skyliners departed Cottonwood at 0800 on 23 February for a hike from Quail Springs Ranch Road to Allen Spring. We drove south on Camino Real/Old Hwy 279 and turned right on Quail Springs Ranch Road, going west. Proceeding toward Mingus Mountain on this road, we crossed Quail Run and continued for approximately another 0.7 miles before turning to the north on a rough dirt road where Quail Springs Ranch Road crosses a wash. We drove up the dirt road to the top of a small hill (about 125 yards) and parked at the junction with another dirt road running east and west. Actually, some of the drivers parked alongside the paved road and walked up the dirt road.

Donning our gear, we hiked east for 0.1 miles on the east-west dirt road before turning north on another dirt road, crossing under a power line, and heading down into the wash that drains the area around Quail Springs. This road ended just over 0.1 miles ahead at Pasture Well. At the well we crossed through a wire gate and entered the wash traveling downstream.

We followed the streambed for about 65 yards before turning north at a rock cairn located where a side wash feeds into the main wash. From the wash, the trail ascends a ridge and follows along its crest to connect with Chuckwalla Road running up Mingus Mountain. However the trail is not well-defined and is easily lost. Even having been through here numerous times, I made several attempts before locating the turn up the ridge. It is best to use a GPS device with a good track when hiking this trail. We did find a few old bits of trail-marking ribbon along the way indicating that we were still on course. However, I still resorted frequently to my GPS device to ensure that we were on the shortest route to our goal, an abandoned green, metal tank located alongside old Forest Road 355, just about 0.1 miles from Chuckwalla Road. From the tank we would follow the old road to join Chuckwalla.

I was following a GPS track made during an April 2009 hike and we had little trouble staying on course. Really, it is just a matter of following the spine of the ridge; however, the ridge is fairly wide and a lot of extra steps can be added by wandering around.

On previous hikes, I had followed close along the south edge of the ridge where it drops steeply to the wash below Quail Springs. That brought me to a wire fence at the point where old FS 355 dropped down into the wash, and we followed that practice for this hike. However, this time we decided that rather than crawling through the fence, we would follow it to the green tank where a wire gate is installed. That was so easy that I laid a new route for that section on the way back by crossing the fence at the wire gate and then returning to our original track farther down the ridge.

Below is shown a picture of the old green tank. The accompanying sign indicates that it was installed as a cooperative venture by the Verde Valley chapter of Quail Unlimited, Laurel Leaf Ranch and Prescott National Forest. The tank is now unused.

Photographed by the author on 24 August 2012
After passing through the wire gate at the green tank, it was only another 0.1 miles to Chuckwalla Road. We were now high enough that we had excellent views in all directions. Looking north across Verde Valley and the Red Rock Country, we had a clear view of the snow-capped San Francisco Peaks. Mingus Mountain, up which we would hike on the way to Allen Spring, loomed to the east.

After a short rest at the junction with Chuckwalla Road, we headed up the mountain, stopping along the way for a snack break and a short rest, and after another 1.4 miles arrived at the point where we would leave Chuckwalla Road to hike along a faint trail that generally follows an old above-ground plastic waterline that previously served the green storage tank and several smaller watering tanks. Before slipping under the fence at a small cairn on the right at a turn in the road, we paused for a group photograph.

Left to right (sitting): the author; (kneeling): George Everman, Dolly Yapp 
and Daisy Williams;(standing): Jim Manning, Donna Goodman, Gordon Bice, 
Lila Wright, Mary Gavan, Becky Fowsky, Anita Jackson, Frank Lombardo, 
Tim Caron, Tom Petesch – photograph by George with time delay
Two of the group, having other commitments for later in the day, turned back at this point. The rest of us slipped under the wire fence and followed the trail along the old waterline. The photograph shown here (right) was taken in August 2012, soon after the cairn was built. The trail crosses the fence just to the right of the cairn. The ribbon faintly visible just above and a bit to the left of the cairn is long gone.

At first the trail is clearly visible, following closely along the pipeline. However, it temporarily leaves the route of the pipeline to cross a wash and climb a hill on the other side before rejoining it further on. The pipeline runs up the wash and crosses at a point where it will be safely above the high water mark during a flood, not a point that is easily crossed by a trail. The photograph (left) shows the trail as it leaves the wash and heads up the hill on the other side.

After a short distance the trail becomes very faint, marked only by a few rocks placed alongside where one might go the wrong way. It is very easy to spend a lot of time making one's way through this section without using a GPS device with a good track. Long pants are a must as the trail is overhung with catclaw. The trail soon joins the old plastic piping remaining from the waterline and continues up a steep slope along a sharp ridge between two washes. Following the trail is fairly easy through this section, however, as the old waterline piping is visible most of the way. There is a break in the line several yards after one encounters a coiled-up section of piping. The photograph seen here (right), taken as we descended the section of trail below the pipeline break on the way back, shows Anita carefully picking her way through the catclaws.

Although the break is not long and the trail is fairly clear through this section, it does not continue along the pipeline after the break, instead veering off to cross the next wash at a different point, again picking an easier route to avoid a difficult crossing. From this point one can see a large rock outcropping below and on the other side of the wash; the trail passes just beside it. Unfortunately, we have to make a steep descent along a brushy, indistinct trail, cross the wash and find our way through more thick brush to reach the rock. There is a trail of sorts, but it is not easy to follow.

The two below photographs, dating from August 2012, show the trail descending into the wash and then leaving the wash on it's way up the mountain by way of a small side wash.

Entering the second wash
Leaving the second wash
The first few times I hiked this way, I believed the wash we had just crossed to be Oak Wash which continues down the mountain to cross Hwy 260 at the Home Depot store in Cottonwood. However, it is really just a side wash flowing into Oak Wash which is on the north side of the hill we were now climbing.

Following the trail along this deviation from the waterline is especially difficult. It meanders its way up the manzanita-covered hillside taking advantage of natural openings in the growth. Along the way, there are numerous false openings that end after a few yards. Some of these are blocked off by carefully-placed rocks and dead manzanita branches, but many are not.

We eventually reconnected with the pipeline and followed it on to connect with an old mining road where we stopped for lunch. After lunch, some of the group wanted to turn back while others wished to hike on to Allen Spring. We decided that those who didn't want to hike farther would wait at this nice sun-bathed spot, an old mine site.

I was testing a new backpack with the approximate weight I would be carrying later this spring for a trip down Paria Canyon, so I skipped my traditional noon nap and headed on up the trail, an old road that connects with a jeep trail that runs just below and parallel to Allen Spring Road. It would be about 0.5 miles to the jeep road, another 0.65 miles south along that road to connect with Allen Spring Road and an additional 0.3 on to Allen Spring. During this 1.45 mile trip, we would climb an additional 750 feet, some of it on a snow-covered road. The spring, located behind the tree shown in the photograph (left) is well-hidden from the road; the hiker who doesn't know it's location is sure to pass by without seeing it.

We paused just long enough to take a photograph (below) of hikers surrounding the locked entrance, before heading back to rejoin the rest of the group.

The entrance to Allen Spring. The entrance is kept locked and I 
have no idea how far the cave extends to the actual spring
Based on my GPS readings, the total hike was 10.40 miles round trip; the maximum elevation was 6086 feet and the total ascent was 2396 feet. Approximate interim hiking distances are as follows:

Trailhead to Chuckwalla Road – 1.7 miles
Distance on Chuckwalla Road – 1.4 miles
Distance along old waterline – 0.7 miles
Distance from old mine site to Allen Spring – 1.45 miles

The GPS track for this hike is shown on the included map (below).


Saturday, February 16, 2013

Squaw Creek Pueblo


The drive across the Aqua Fria National Monument to Squaw Creek Pueblo Ruin is on a dirt road that is best avoided in wet weather. We had canceled the previous week's hike due to bad weather and I had anxiously watched the weather forecast all week. The weather cooperated and we experienced four sunny days preceding the day of our planned hike, itself a fifth sunny day. The road would be dry and hiking conditions good, so it was with great anticipation that fourteen Skyliners left Cottonwood on 16 February 2013 to visit Squaw Creek Pueblo and view the rock art (a lot of petroglyphs along with a few pictographs) located on the cliff wall below the ruins.

Leaving Cottonwood, we drove to Camp Verde and took I-17 south to Bloody Basin Road. This road apparently begins as County Road 172 but becomes BLM Road 9269.

This intriguing name, Bloody Basin, of course elicited a discussion as to its origin. Some thought it came from fighting between cattle ranchers and sheep ranchers, some from the dull red color of some of the rocks in the area.

My favorite explanation is from AZCentral.com which says that, “Bloody Basin ... got its name from a fight between the Army and a band of Apaches1....” This AZCentral.com quote apparently refers to the 27 March 1873 Battle on Turret Peak which occurred during the Tonto Basin Campaign against the Apaches, commanded by General Crook. Captain George Randall of the 23rd Cavalry led a punitive expedition against a band of Tonto-Apache Indians in retaliation for the killing of three men, one of whom was taken alive and tortured. The troops slaughtered 26 Indians at Turret Peak. According to The Natural American, “It was Crook's Tonto Campaign, and more specifically the Battle at Turret Peak, that resulted in the name "Bloody Basin" being given to this locale2.”

From the I-17 exit we drove eleven miles on Bloody Basin Road, passing the turnoff to Horseshoe Ranch at around five miles and fording the Aqua Fria River on a concrete pad after about another two-tenths of a mile. County maintenance of Bloody Basin road ends at the ranch and we were then on the somewhat rougher, but still easily passable, BLM Road 9269. The turnoff to BLM 9014, leading toward our goal, is marked by a small road number marker, but more prominently, by a BLM information kiosk.

We traveled south on BLM 9014 (which changes to FR 14 when the road crosses into Tonto National Forest after 2.4 miles) for 2.8 miles before turning left at Tank Creek to continue south, still on FR 14 for another 1.6 miles. At this point, we parked our cars to start the hike at a gate which marks the turn onto FR 610.

We parked here and hiked southwest on FR 610 (gate is normally kept closed)
We hiked on FR 610 for only about 0.4 miles before it veered to the right while we continued to the southwest on what was now FR 599 (unsigned). We followed this road for 2 miles before turning to the southeast on FR 3164 (unsigned). From there it was another 0.7-miles to the main ruin on the canyon wall overlooking North Fork Squaw Creek. However, there is a smaller ruin located about a quarter of a mile from FR 599 and we stopped to look at that and take a group photograph before continuing on to the main ruin.

Left to right (kneeling): Colleen Maktenieks, Daisy Williams, the author and Dolly Yapp; (standing):
Donna Goodman, Kwi Johnson, Anita Jackson, Miriam Sterling, Lila Wright, Jim Manning, Frank 
Lombardo, Laurie Sudol and Mark Purcell – photograph by the fourteenth hiker
The ruin itself, not very noticeable from the road, was marked by a number of deteriorated rock-walled structures.

Small ruin located about half a mile from the main Squaw Creek Pueblo Ruin
The road took us to the southwest end of the ruin which is spread out atop the canyon wall above the North Fork of Squaw Creek. The canyon at this point runs in the northeast-southwest direction. Looking directly east, the creek was visible some 700 feet below. The primary route to access the petroglyphs, located along the face of the canyon just below the rim, is by way of a faint trail leading down from this point. However, the rock art is spread out along the rim both ways from that point. Most of them are along the northeastern section; however a few, including some pictographs are located to the southwest of the ruin. The result is that if one descends at this point, it is necessary to retrace ones path in order to see all of the petroglyphs.

Not wanting to retrace my steps along the wall below the rim, I elected to go through the ruin and descend at the northeast perimeter. I would then travel all the way along the rim past the colored figures and return to the rim by way of a hole in the cliff wall that I had used previously. The rest of the group descended along the traditional path as shown in the photograph (right).

As I hiked through the ruin, I saw that it was much the same as the smaller one where we had stopped for a photograph, just more extensive. The structures, as can be seen in the photograph (left) were all of the pit-house style with the plentiful rocks in the area used as walls and to extend the buildings above the dug out pits.

I found it to be relatively easy going as I made my way, sans pack which I had shed upon arrival, through the maze of old deteriorated structures, and I was soon at the northeast corner and ready to descend. At the right edge of the below photograph you can see the end of the steep cliff wall that protected the people living in the ruin above from attack by way of the canyon. My path to view the petroglyphs would follow along below the cliff wall, all the way past the ruin, on past the colored drawings and to the hole by which I would ascent back to the rim.

Descending from the northeast end of the ruin to view the petroglyphs
My trek along the canyon wall would be about 0.3 miles. Most of the petroglyphs were located in the first third of the trip; the colored drawings were in the second third; the last third was primarily to avoid retracing my path, but also because I really wanted to climb through the hole in the rim to return to the top.
The petroglyphs are numerous along the wall directly below the ruin and the following photographs represent just a small sample of them. I will just present the drawings here, leaving identification and commentary to more qualified persons.

The first drawing I saw on this trip 
Miscellaneous drawings
More miscellaneous drawings
Soon enough I was past the main ruin and closing in on the colored drawings (more properly called pictographs). I am told that these differ in that Petroglyphs are formed by removing the patina formed on rock by wind and rain and sculpting and carving the rock beneath, while pictographs are drawn or painted onto a rock surface and require no sculpting, carving or engraving3. The below photograph shows two pictographs seen on the cliff wall just below the rim and a bit southwest of the main ruin above North Fork Squaw Creek.

Pictographs scattered among the petroglyphs at Squaw Creek Pueblo Ruins
There were only a few scattered petroglyphs beyond the pictographs and, seeing nothing to distinguish them from those already photographed, I did not bother with them, but headed straight for the hole in the rim (right) through which we would climb to the top.

By this time all save two other hikers had turned back, preferring to retrace their path and ascend the way they had come. I climbed through what we have referred to as the “rattlesnake” hole, because it would seem a great place for rattlers during hot weather, and positioned myself to take a picture of Colleen as she emerged (left).

The below blow-up of a section of my GPS track shows my path along the face of the cliff (green track), the location of the main ruin (red diamond), the approximate location of the pictographs (green diamond), “rattlesnake hole” (green pin) and the path along the top of the rim (blood red track).

Track along the rim and approximate location of pictographs

The following map (below) shows our track from I-17 to Squaw Creek Pueblo Ruins. Bloody Basin Road is shown in (red), BLM 9014/FR 14 in (green), FR 610 (blue), FR 599 in (dark cyan) and FR 3160 in (magenta).

Route from I-17 to Squaw Creek Pueblo Ruins
1http://www.azcentral.com/travel/articles/2009/05/21/20090521azhist0522.html
2http://www.thenaturalamerican.com/bloody_basin_and_beyond.htm

3http://seethesouthwest.com/3519/what-is-the-difference-between-a-petroglyph-and-a-pictograph/

Saturday, February 2, 2013

Rattlesnake Canyon and Nearby Indian Ruins


Eleven Skyliners hiked to the gaging station in Rattlesnake Canyon on 2 February 2013 and then to Indian ruins located on the east rim of the canyon just south of the gaging station.

We drove north on I-17 from Verde Valley and took the Stoneman Lake Road exit. Turning back under the freeway, we turned as though to enter the freeway on the southbound ramp, but then immediately veered right onto a dirt road (Forest Road 647, though unsigned). About 0.3 miles from the I-17 exit, we came to a very rough section of the road where it crosses a wash. High clearance vehicles, even 4-wheel drive in wet weather, are highly desirable here. The below photograph of this section of road was taken on the return trip.

David Beach wending his way across a small, surprisingly deep, 
water-filled wash
After crossing the wash we drove along a smooth, well-packed dirt road for another 0.5 miles before coming to a 90% right turn. At this point the road started to become rougher and ever more muddy, so we parked after going only about another tenth of a mile. From there we walked along the road for another 0.7 miles to the rim of Rattlesnake Canyon, stepping on rocks and clumps of grass in an attempt to avoid the mud. This photograph below shows the condition of the road along this section.

Rugged road on the way to Rattlesnake Canyon
We soon arrived at the canyon rim above the gaging station and stopped there for a group photograph.

Left to right: Bob Wakefield, Kwi Johnson, David Beach, Dolly  Yapp, 

the author,  Lila Wright, Jim Manning, Janet Wakefield, Daisy Williams 

and Miriam Sterling – photograph by the eleventh hiker using 
the author's camera
In the preceding photograph, the opposite canyon wall can be seen in the background while Munds Mountain dominates the skyline.

The below photograph was taken facing down the canyon from our position on the rim. It is looking out the mouth of Rattlesnake Canyon where it dumps into Woods Canyon. The cluster of white buildings in the center are the Red Rock Ranger District headquarters. On the horizon, Mingus Mountain is shown at the left while Woodchute is seen to the right.

Looking down Rattlesnake Canyon from the rim above the gaging station
From the rim the road winds its way down the canyon wall for about 300 yards, dropping around a 100 feet, before ending at a wide turn-around area. This gets us to the only difficult part of the hike, a steep descent along a not very-well maintained, but easily followed, trail to the gaging station. The turn-around area, located at the edge of the Munds Mountain Wilderness, appears to be a much-used camping area and the point where the trail starts is not clearly defined unless one knows to look for a marked rock (above, right). The two white blobs on the rock are concrete engraved with some odd markings, perhaps something from an Oriental alphabet. The trail starts just to the right of the rock and is faint at first, but easily followed all the way to the gaging station. The below photograph shows its condition on this early February day.

Condition of trail down into Rattlesnake Canyon
Some parts of the trail were very treacherous because of ice-covered rocks, caused by melting snow which had refrozen. But with a little care we all made it to the bottom without mishap. I really don't know whether the gaging station is still in use, but I think it must be because it appears to be very well-maintained. The walkway leading from the canyon wall to the instrument was still in good condition (left), as was a ladder attached to the opposite side of the tower. In fact some of our hikers climbed the ladder and then returned by way of the walkway.

Recent rains and melting snow meant that the stream was flowing strongly and any idea of traveling up or down the streambed had to be abandoned. Instead we just stopped for a snack and spent some time admiring the waterfall, shown below.

Waterfall at the gaging station
Leaving the gaging station and the comforting roar of the waterfall behind, we started out trek back out of the canyon. As we zigzagged our way up to the rim, we could see the promontory (right) that contains the Indian ruins, jutting from the canyon wall less than half a mile downstream from our position.

Although the climb back to the rim was pretty steep, about 300 feet in just over 0.3 miles, we arrived at the top in good condition and set out immediately along the rim to find the Indian ruins. We actually left the road we had followed part way down the canyon wall about fifty yards short of the top to follow another road running south along the rim. This road, well-drained and dry, was easy walking. Unfortunately it soon came to an end and we once again found ourselves hopping along on boulders and clumps of grass to avoid becoming mired in the mud. Fortunately, the ruins were only about three-tenths of a mile away and we soon saw them looming ahead through the trees.

Approaching Indian ruins located on the rim of Rattlesnake Canyon
These ruins seem to have been primarily a fortified defensive position. Attacking from Rattlesnake Canyon would have been impossible and the rock walls built along the eastern flank would have provided good protection from that direction. Attackers would have had to cross a small wash and then climb a slight slope while faced with defenders ensconced behind the rock walls. We saw no signs of any permanent dwellings at the sight, but it would have been a great place for temporarily withstanding an attack while waiting for reinforcements to arrive.

Fortifications at the Indian ruins
The ruins were an excellent viewpoint. Looking downstream, we could see out the mouth of the canyon all the way to the Black Hills on the horizon; looking directly across the canyon, we had Munds Mountain on the horizon; while looking upstream and down into the canyon, we had a clear view of the waterfall at the gaging station (left).

We ate lunch amidst the ruins after which we reluctantly gathered our gear and started the hike back to our waiting cars. Rather than return closely along the rim to rejoin Forest Road 647, the route back to where we were parked, we cut across country to shorten the distance. This is shown by the blue line on the included map.

The return hike was relatively short and we were soon in our vehicles and on our way back home. However, Lila had noted a cairn alongside the road at the 90% bend and she remembered it as being the starting point for a hike she did several years ago along part of the old Chavez Trail running between Verde Valley and Winslow (then Sunset Point). We stopped there to examine the cairn (right) and found that it was followed a short distance away by another. Encouraged, we scheduled the Chavez Trail for an exploratory hike later in the month.

Today's hike was only about 2.4 miles round trip. The route from where we parked to the gaging station is shown in red on the included map (below), the short distance from the ruins to connect to Forest Road 649 near where we were parked is shown in blue and the road from I-17 to where we parked is shown in yellow. The elevation change was just over 300 feet; however almost all of this was accounted for in just over three-tenths of a mile.