Saturday, November 26, 2011

Verde River Falls From the East


Fourteen Skyliners hiked to Verde River Falls on Saturday, 26 November 2011. We met in the Cottonwood Safeway parking lot and loaded into four-wheel drive vehicles. Leaving Cottonwood on Hwy 260, we drove through Camp Verde and turned on Fossil Creek Road. We turned off Fossil Creek Road onto FR 500 and followed it for about three miles before turning right onto FR 9244, which we followed until it ends on the bluff on the east side of Verde River in the area of the falls. FR 500 and FR 9244 are four-wheel drive roads and the going is very slow. After parking at the end of FR 9244 we passed through the gate shown below to hike down to the river.

Trailhead leading from the end of FR 9244 down to the river
About a tenth of a mile ahead the trail splits and one can go right to descend the canyon wall upstream of the falls or left to descend below the falls. For this hike we chose to go left and followed the trail down into a wash, reaching the bottom of the Verde River Canyon where the wash empties into it. It was a gradual descent all the way. However, the riverbank at this point is overgrown with thick vegetation and it is impossible to go upstream close along the stream bank. We instead stayed close against the cliff wall where the going was somewhat easier, but still required us to force our way through brush in places. About a tenth of a mile upstream from where we entered the canyon, we came to an old meander (obviously still used by the river during high water, but containing only a few pools of water now) and crossed over to stop for a snack on the rocky divide between the meander and the stream proper.

Stopped for a snack on the rocky divide between a meander and the 
main stream
After our snack we continued on upstream toward the falls, passing a well-camouflaged Salt River Project measuring station on the way (below).

Salt River Project measuring station with solar panels embedded in the top
There are three noticeable falls along this stretch of the river; I think the middle one is Verde River Falls. I suppose it is possible that all three may really constitute the falls. If that is true, I am at least approximately accurate when I call the middle one the falls. Approaching from downstream, I stopped to take a picture of the lower of the three.

Lower of three falls along this section
Between the lower and the middle falls we passed a couple of canoeists on their way from Clear Creek to Fossil Creek. This was the second day of their journey.

Canoeists on their way from Clear Creek to Fossil Creek
Soon after passing the canoeists we came to the middle and most impressive of the falls. We paused here for a short time to take pictures and listen to the roar of the water.

Middle and most impressive of the three falls
A short distance further upstream is located the third fall. We paused there to enjoy the view then posed for a group photograph.

Upper of the three falls located along this stretch of river
George used the time delay feature on my camera, mounted on his small, lightweight tripod, to take the following group photograph.

Left to right: Mery Womack, Gordon Bice, Lila Wright, Jan PreFontaine 
(front), Dolly Yapp (rear), Virginia Driscoll (middle), Daisy Williams (front), 
Donna Goodman (rear), Betty Wolters (second from rear), the author 
(second from front), Linda Tovar (front), John McInerney, George Everman 
and Jim Manning
According to my GPS the distance from the Cottonwood Safeway parking lot to Fossil Creek Road is 23 miles, the distance on Fossil Creek Road to FR 500 is 1.1 miles, the distance on FR 500 to FR 9244 is 3 miles and the distance on FR 9244 to the parking area is 1.3 miles. The actual hike distance, shown below, was only about 1.3 miles.

Showing the actual hike from the parking area to the river and back
The actual hike from the parking lot and back was 1.3 miles, the highest elevation was 3099 feet and the total ascent was 495 feet.

The included map (below) shows the route to the falls from the Fossil Creek turnoff from Hwy 260. Fossil Creek Road is shown in dark red, Forest Road 500 is shown in dark magenta and Forest Road 9244 is shown in dark yellow. The hike itself is displayed in red.


Saturday, November 19, 2011

Purtymun Trail & Along the Rim


Seven Skyliners hiked Purtymun Trail up the east side of Oak Creek Canyon and continued north along the rim for approximately 1.6 miles on Saturday, 19 November 2011.

We met at the Cottonwood Safeway parking lot and proceed north on Hwy 89A, stopping in Sedona to pick up George at his home. We then continued up the canyon and parked at a wide shoulder on the road about 75 yards north of the main entrance to Junipines resort. The unmarked trailhead is between two utility buildings on the east side of the highway across from the main entrance to the resort. The trail is easily discernible if you look closely. Just scramble up the bank between the two buildings and you will see it leading on up the canyon wall. Up is the operate word here; the trail is clear and easy to follow, but it is steep, climbing some 1200 feet in just a bit less than a mile (NOTE: I have gotten various readings between 0.7 and 1 mile.).

Looking back as we neared the rim, we found a gorgeous rainbow arching across the slope below us.

Rainbow in Oak Creek Canyon as seen from high on the Purtymun Trail
When we scouted the trail about a month ago the upper portion was a bit overgrown; however, it has since been trimmed and is now in good shape all the way to the top.

The below group photograph was taken where Purtymun tops out on the rim.

Left to right: Donna Goodman, Miriam Sterling, Betty Wolters, the author, 
George Everman, Marvin Alt and David Beach
After a long break in the brisk, cold breeze at the top of the trail, we set off heading north to hike a section of the Purtymun to Cookstove Trail. From Purtymun at N340 57.725; W1110 44.872 we hiked 0.5 miles bearing 650 true to the first of three old road crossings at N340 58.139; W1110 44.151. From there we continued for 0.2 miles at a bearing of 490 to the second old road crossing at N340 58.018; W1110 44.250. We then hiked another 0.2 miles at a bearing of 340 to the third crossing of the old road at N340 57.725; W1110 44.872. After crossing the old road for the third time, we continued at a bearing of 430 for another 0.7 miles to again intersect with the same old road at N340 57.725; W1110 44.872 near Crazy Park Canyon. It was now 1200, time for lunch. After a relatively short lunch break, we started our return journey. It had taken us almost three hours to get this far and we wanted to get back down Purtymun by 1500.

We had been roughly following the old Purtymun to Telephone Trail. This trail, along with a Thomas Point to Cookstove Trail and a Telephone to Cookstove Trail, is sketched out on the Arizona topographic map I am using with my GPS, but they are not discernible trails for much of the way; they are rather a series of straight lines, apparently drawn from point to point. The green line (I call it Purtymun to Cookstove.) on the included map (below) uses parts of all of these trails along with various Forest Roads. It swings away from the rim to cross Surveyor Canyon, then connects with and utilizes the National Forest road system (FR 9493A, FR 9498 and FR 9496). This results in its passing Thomas Point about a mile from the rim before swinging back to pass the Telephone trailhead just 0.2 miles from the rim. Shortly after passing the Telephone trailhead, while crossing the ridge above Grandmaw’s Cave, the forest road ends and a discernible trail begins, leading to Harding Springs Trail and continuing to end at Cookstove Trail.

In my opinion, the track we followed to our lunch stop, as shown on the attached map (and also included in the GPS file), is the best route to follow to this point. To continue from here on what I am calling the Purtymun to Cookstove Trail, I recommend following the old road from where we ate lunch, heading generally north, for 0.4 miles to N340 58.676; W1110 43.609. From there it is a relatively easy 0.3 mile climb at a bearing of 710 down into the upper reaches of Surveyor Canyon and back up the other side to reach FR 9493A at N340 58.765; W1110 43.278.
Purtymun Trail itself (below), from Hwy 89A to the rim, is xxx-miles one way; it has a maximum elevation of 6371 feet and a total ascent of 1318 feet.

Purtymun Trail as it climbs the east wall of Oak Creek Canyon
The included map (below) shows all of the trails we have hiked along the east rim of Oak Creek Canyon, including a recent scouting hike from the Willard Springs area to Thomas Point and back.

Today’s hike was only about 4.5 miles roundtrip; however the first mile (Purtymun Trail proper) was very strenuous and took around 1.5 hours each way. The total elevation gain for the hike was about 1500 feet, and we were on the trail for a total of about 6 hours.


Saturday, November 12, 2011

Soldier Pass to Brins Mesa


On 12 November 2011 the Skyliners hiked Soldier Pass Trail to Brins Mesa. We gathered at the Safeway parking lot in Cottonwood and carpooled from there, following Hwy 89A to Sedona, turning left to follow Soldier Pass Road for 1.5 miles and then right to follow Rim Shadows Dr and Shadows Canyon Drive for another 0.2 miles to the gated entry to the trailhead parking lot on the left. Note that Rim Shadows Drive turns sharply left before reaching the gate to the trailhead; just proceed straight ahead at this point on Canyon Shadows Drive and you will find the gate on the left about 70 yards ahead.

Leaving the parking lot we hiked across a wash and a short distance up the slope on the other side to arrive at the intersection with Jordan and Teacup Trails (right). Just a little further along we came to Devil’s Kitchen and paused on its rim for a group photograph. George used the time delay feature on my camera, and “Wally,” a small, lightweight tripod with flexible legs that can wrap around tree limbs for the shot.

Left to right: Gordon Bice, George Everman, Lila Wright, John Wright, 
Daisy Williams, Jon Lloyd, Ellis Price and Kwi Johnson – at Devil’s Kitchen
Devil’s Kitchen is a rather impressive sinkhole located a short distance from the trailhead. Except for the large fallen rocks, it is much like the sinkholes caused by the dissolution of underlying limestone familiar to me from my youth in East Tennessee. Wikipedia provides the following information on the subject of sinkholes:

A sinkhole, also known as a sink, shake hole, swallow hole, swallet, doline or cenote, is a natural depression or hole in the Earth's surface caused by karst processes — the chemical dissolution of carbonate rocks or suffosion processes for example in sandstone. Sinkholes may vary in size from 1 to 600 meters (3.3 to 2,000 ft) both in diameter and depth, and vary in form from soil-lined bowls to bedrock-edged chasms. Sinkholes may be formed gradually or suddenly, and are found worldwide. The different terms for sinkholes are often used interchangeably.1

Devil’s Kitchen sinkhole
From Devil’s Kitchen it is just a short distance on along the trail to the Seven Sacred Pools. Some sources refer to these as Apache Seven Pools and indicate that they were sacred to the Apache. The pools were not very impressive today; some had been partly filled in with accumulated rocks and, while they did contain water, no water was running between the pools.

At the Seven Sacred Pools – by Jon Lloyd
Continuing on up the canyon from the pools we could see the arches to our right; we stopped for a brief rest and a snack just below Brins Mesa.

When we reached the mesa where Soldier Pass Trail ends at the intersection with Brins Mesa Trail, my GPS showed that we had hiked just over 2.1 miles from the parking lot. (NOTE: See related comment in the last paragraph of this report.) At that point we turned southeast and followed Brins Mesa Trail for about 0.75 miles to the edge of the mesa and then turned northeast to follow an unmarked trail for close to 0.9 miles to the summit (summit of Brins Mesa) for lunch. I found one map that identified the trail we followed to the summit as “Brins Summit.” No signs are posted; however the trail is easy to follow. When we reached the summit the wind was brisk and it was a little chilly on this November day, but we were rewarded with awe-inspiring views in all directions. Jon took several photographs from our vantage point.

Looking back down on Brins Mesa – by Jon Lloyd
Looking down from Brims Mesa – by Jon
I managed to find a cozy spot well sheltered from the wind and settled in for lunch and my traditional noon nap; Gordon did likewise. After lunch we hiked another hundred yards to the highest point on the mesa and then headed back the way we had come.

George posing on the summit of Brins Mesa – by Jon Lloyd
Taken on the way back from Brins mesa summit – by Jon Lloyd
After some discussion as to the possibility of taking another route back to the cars, we chose to return the way we had come. However a later look at the map indicates that the distance would have been approximately the same had we continued southeast on Brins Mesa Trail and taken Cibola Pass Trail and then Jordan Trail back. These are both shown on the Arizona topo map I use.

On the way back down Soldier Pass Trail we stopped for a brief rope climbing demonstration by John Wright. Lila has decided that we should start carrying a 50-foot length of rope with us on our hikes for use in emergencies.

My GPS gave a reading of 7.5 miles for this round trip hike, but when I downloaded the track to my computer and examined track properties the distance was shown as only 6.1 miles. Track properties on my computer also gave me 1.7 miles for the length of Soldier Pass Trail while the Forest service map provides a figure of 2.4 miles and I had measured it as about 2.15 miles. After considering all of this conflicting information, I used 2.15 as the length of Soldier Pass Trail and adjusted all of the other distances provided in the first paragraph of this report accordingly.

I consider this an easy hike. The elevation change from the trailhead to the summit of Brins Mesa is only around 1000 feet and the climb is gradual with a relatively few exceptions.


1 http://en.wikipedia.org/wiki/Sinkhole

Friday, October 28, 2011

Indian Ruins at Mullican Canyon


On 28 October 2011 nine Skyliners hiked to the Indian Ruins at Mullican Canyon. The below group picture was taken at the ruins.

Left to right: Betty Wolters, Dolly Yapp, George Everman, Ellis Price, Daisy 
Williams, Marvin Alt, Miriam Sterling, Lila Wright and Donna Goodman
We all met at the Safeway parking lot and drove through Cornville to interstate 17.  We then drove north on I-17 to Exit 306 and turned off on Stoneman Lake Road.  The spot where we parked for the hike is seventeen miles from I-17 on mostly dirt roads.  From I-17 we followed Stoneman Lake Road east for 6.4 miles until we came to a T.  At the T we turned right on FR 922 and followed it for about 1.6 miles before making a 90-degree right turn onto FR 644.  We followed FR 644 for 9.3 miles, passing Mullican Place Tank and Three-Jim Tank on the way, before parking just after the road crosses a shallow wash.  The location is at N34043’ 35.84” W111039’ 47.58”.

The topographic map we were using in the GPS showed three weirs, used long ago to measure stream flow, along the course of our travels.  Two of these are located along FR 644, the first at Three-Jim Tank and the second just a short distance down stream from the tank.  The third weir is shown by the map to be located along the wash we followed between FR 644 and Mullican Canyon where the ruins are located.  We never found any sign of the third weir, not even the remains of a foundation and were left to wonder whether the map entry might have been an error.

For those who are curious, a weir can be described as “… a small overflow dam used to alter the flow characteristics of a river or stream. In most cases weirs take the form of a barrier across the river that causes water to pool behind the structure (not unlike a dam), but allows water to flow over the top. Weirs are commonly used to alter the flow regime of the river, prevent flooding, measure discharge and to help render a river navigable.1

After parking we followed the wash downstream, first along the bank, then entering the wash itself when the going become easier there.  It is approximately 0.95 miles from the road to the Indian ruins.  They are located atop an outcropping, separated from the canyon wall proper by an abandoned meander (rincon).  Part of the ruins can be seen directly ahead as you proceed down the side canyon formed by the wash you are in toward its junction with Mullican Canyon. As you approach them look carefully to the north face of the side canyon you are in.  About 100 yards before you reach the ruins look carefully and you will find distinctive Indian drawings located high on the north wall of the wash.

Indian drawing
Indian Drawing
These drawings don’t just jump out at you unless the sun is exactly right; however, they are visible at any time if you look closely.  As for me, I hiked this way twice before I finally noted them.

A section of the Indian ruins can be seen atop the outcropping shown here. 
Note the man-made rock wall running along the periphery
At the foot of the outcropping on which the ruins are located lies a deep pool of water.  The side canyon (or wash) we have been traveling down is at this point almost perfectly parallel to Mullican Canyon.  At one time the stream apparently flowed to the left of the outcropping into Mullican Canyon further downstream.  It has since been diverted by some geological event that allowed it to break through and flow to the right of the outcropping, spilling directly into Mullican Canyon.


Deep pool at the foot of the outcropping containing the Indian ruins 
– overflow from the pool is directly into Mullican Canyon through the 
opening visible to the right
To reach the ruins it is necessary to climb along the face of the canyon, crossing above the pool, and enter the abandoned meander (rincon).  From there it is possible, although difficult, to climb up to the peak of the outcropping where the ruins are located.  In the photograph below hikers are shown navigating the perilous route along the canyon wall toward the meander.

Hikers are shown climbing along the canyon wall above the pool – the 
shoulder of the outcropping containing the ruins is visible to the right 
– the saddle between the canyon wall and the outcropping is the old 
stream course, or “abandoned meander.”
The most direct route on up to the ruins is to climb up the steep, rocky slope as soon as you reach the meander.  A somewhat easier climb is possible a few yards further down the meander; however, undergrowth makes those few yards almost impassable.  Any path you choose is a steep, perilous climb requiring great care to avoid slipping.  But the reward is great once you reach the ruins.

Looking on down Mullican Canyon from the ruins we could see its confluence with Rarick Canyon 0.8 miles to the west.  Later reference to an online map, disclosed that I-17 at the closest point lies just 1.2 miles to the northwest across Mullican and Rarick Canyons from the ruins.  But, as the saying goes, you can’t get there from here.
It was still rather early for lunch and we had stopped for a snack on the way down the wash, so I wasn’t very hungry.  While the rest of the group looked around the ruins and ate lunch, I seized the opportunity for a good nap.  I was sound asleep when George awakened me.

Before starting back we paused for the group photograph shown at the beginning of this report.  George took the shot using my camera on time delay.  Then after carefully climbing back down the steep, rocky slope to the old meander and making our way along the canyon wall above the pool, we started rock hopping our way back up the wash toward our waiting vehicles.

Climbing back along the canyon wall above the pool on our way up the 
wash, shown directly ahead – photograph by George on a previous hike
Having noting that FR 644, the road we had driven in on, continued along the hill above and generally parallel to the wash we were following, we decided to climb out of the wash at the first good opportunity and make our way up the slope to the road.  It would appear to be a much easier hike than continuing along the rocky bed of the wash, and so it was.  Using a GPS to find the most direct route we soon arrived at the road about half a mile from our cars.

Although we were parked to the east of where we entered the road (FR 644) we saw some artifacts about 200 yards in the other direction and went that way to investigate.  What we found were the remains of an old corral and another weir located in a wash at the end of FR 644.  The below photograph was taken from just upstream of the weir looking over it into the chasm the stream had formed on its way to Mullican Canyon.

Photograph taken from the bed of the wash located at the end of FR 644. 
The walkway runs along the top of the weir. From there the stream 
drops sharply into a deep chasm on its way to the canyon below
Examining the weir: Marvin alt (partial at top), Dolly Yapp, Lila Wright 
and George Everman
The total hiking distance was only about 1.9 miles.  However, that is somewhat deceptive because the going is rough, except for the part of the return trip that was along FR 644.  The wash is rocky and requires stepping carefully all the way to avoid sprained ankles and falls, several places require climbing over or around steep ledges in the streambed, the climb along the canyon wall above the pool is quite perilous and the final climb to the ruins is steep and rocky.

This is a moderately difficult hike overall with a few very difficult areas; it is not for those with weak ankles or those who do not like a little rock climbing.  Some of the rough hiking in the streambed can be avoided by parking at the spot where we rejoined FR 644 at N340 43’29.92”; N1110 40’15.07” and hiking north to join the wash closer to the ruins.

An Alternative Hike to the Indian Ruins

A good alternative to parking where we did for this hike is to park instead at 3-Jim Tank. Weir Number 1 is located there in the same wash that we followed on this hike to reach the ruins at its juncture with Mullican Canyon. It is just farther upstream and the hike is thus a bit longer. As compensation for the longer hike you can investigate the remains of the extensive water measuring system once installed along the wash. Weir Number 1 is, as noted previously in this report, only the first of three weirs once in place along the wash. Number 2 is between 3-Jim Tank and the place where we parked for today's hike; A Weir Number 3 was apparently once located between there and Mullican Canyon, but no longer exists. The weir featured in today's hike report is located in an entirely different wash that empties into Mullican Canyon at a different point. Some of the artifacts and sites to be seen along this alternative hike to the ruins are shown in these four photographs (below).

Weir Number 1
A well-constructed hunter's blind located near Weir Number 1
In the wash below Weir Number 1, approaching Weir Number 2
Weir Number 2
As previously noted, Weir Number 3 no longer exists, and we were left wondering if it ever did.
The included map (below) shows the immediate area of this hike. Interstate 17 is visible running diagonally across the upper left corner. The dirt road running between I-17 and Rarick Canyon is Beaver Creek Road. The blue line on the map is the route we took from our cars down the wash to the ruins at Mullican Canyon. The yellow line shows our return route including the side trip to the unnamed weir. The green line shows the last bit of our drive in from I-17.

To hike to the ruins by way of weirs 1 and 2, just park at 3-Jim Tank and follow the blue track shown on the included map down the wash.


1 http://en.wikipedia.org/wiki/Weir

Saturday, October 1, 2011

Lava River Cave


Nine Skyliner hikers visited Lava river Cave near Flagstaff on Saturday, 01 October 2011. We met at the Cottonwood Safeway Parking lot at 0700 and car pooled from there, traveling to Flagstaff via Hwy 89A and stopping at Coco’s for breakfast.

The following information is excerpted from Wikipedia:1

Lava River Cave is a lava tube cave in northern Arizona's Coconino National Forest. At approximately 0.75-mile (1.21 km) long, it is the longest cave of this kind known in Arizona. The cave was discovered by some lumbermen in 1915. The cave has also historically been referred to as "Government Cave" due to its location on the eastern edge of Government Prairie and southeast of Government Peak. Today, Lava River Cave is freely accessible to the general public.
Geologists believe the cave was formed sometime between 650,000 and 700,000 years ago when molten lava erupted from a volcanic vent in nearby Hart Prairie. The top, sides and bottom of the flow cooled and solidified, while lava in the middle flowed out, leaving a hollow space to form the cave. Examples of both ʻAʻā and Pāhoehoe basaltic lava can be seen in the cave.2

The cave is mostly dry, but due to the temperature change, there is a lot of condensation on the walls, ceiling and floor near the entrance, which makes it slippery. Temperatures inside are around 40°F (5°C) during the summer, and it is not uncommon for some of the rocks to be covered with ice. The cave can range in height from 30 feet (9.1 m) to only 2 to 3 feet (0.61 to 0.91 m). There are no light sources inside. It is recommended visitors have sturdy hiking boots, warm clothing, and multiple sources of light.

Litter and graffiti have been problems since the late 1960s. A major restoration effort was organized in May 1991. Almost all the litter was packed out and much of the graffiti removed at that time. Dogs should not be taken in the cave since there are only limited and very slow biological processes to render their urine and feces unobjectionable.

The entrance to the cave is around 14 miles (23 km) north of Flagstaff, Arizona. Being in Coconino National Forest, the cave is managed by the United States Forest Service. While the cave is open year round, the dirt roads which lead there may be impassable to cars in winter months or during wet weather conditions. There are no entrance or use fees.

I found the following descriptions for Lava types ʻAʻā and Pāhoehoe:

ʻAʻā (also spelled aa, aʻa, ʻaʻa, and a-aa; pronounced /ˈɑː.ɑː/ or /ˈɑːʔɑː/, from Hawaiian [ʔəˈʔaː][6] meaning "stony rough lava", but also to "burn" or "blaze") is one of three basic types of flow lava. ʻAʻā is basaltic lava characterized by a rough or rubbly surface composed of broken lava blocks called clinker.3

Pāhoehoe (also spelled pahoehoe, pronounced /pəˈhoʊ.iːˈhoʊ.iː/, from Hawaiian [paːˈhoweˈhowe],[8] meaning "smooth, unbroken lava") is basaltic lava that has a smooth, billowy, undulating, or ropy surface. These surface features are due to the movement of very fluid lava under a congealing surface crust.4

George had left Wally the tripod in the truck and there was no good place to set the camera for a time delay shot, so George, the photographer, is not in this group shot.

Left to right: Loren Pritzel, Virginia Driscoll, Ellis Price, Gordon Bice, 
Kwi Johnson (front row), Daisy Williams, Dolly Yapp (front row) 
and Lila Wright – photograph by George
Two signs were posted providing information about the cave. These are shown on the next page.

General information
Interpretive sign
Upon entering the cave, the first fifty yards or so slope steeply down and the way is very rocky. It would be very rough going in the winter when ice could be expected near the cave opening. As it were we found that the rocks were wet and slippery as we descended. However, we were soon past the steepest, rockiest part and the going was somewhat easier.

Gordon was leading the way and George was bringing up the rear to make sure no one was left behind. I was following close behind Gordon and whenever we noted that we could not count seven lights behind us we stopped and waited for the rest of the party to catch up. The below photograph was taken during one such stop and shows George and Daisy appearing out of the darkness. Until they were close enough to be illuminated by our lights all we could see was their flashlights, like two large fireflies drifting in the breeze.

Left to right: Dolly, Daisy and George (appearing out of the darkness) 
and Kwi
Somewhere along the way we came to a section with a relatively smooth floor that provided for somewhat easier walking. The floor surface here appeared similar to a very, very rough sidewalk with oversize gravel, or pre-hardened lumps of concrete, imbedded in the surface. I learned later that it was probably type ʻAʻā (meaning "stony rough lava", but also to "burn" or "blaze") lava, one of three basic types of flow lava. I took two photographs of the floor, one also showing some sort of fungus (or mold) growth.

Section of cave floor showing ʻAʻā lave (I think) 
Section of cave floor showing ʻAʻā lave (I think) along with mold 
– Gordon’s hand is seen at right
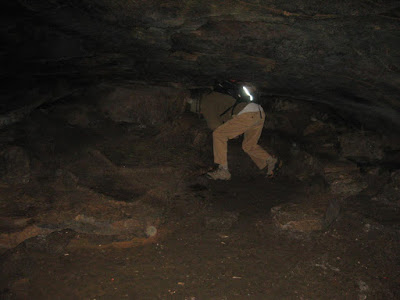
About ¼ mile from the entrance the cave splits, a smaller branch leading off to the right and reconnecting with the main branch a short distance ahead. We decided to take the smaller branch on the way in and then follow the larger branch on the return trip. Gordon is shown below entering a low section; about here I was wishing I had brought knee pads.

Gordon entering a section of the side branch with a very low overhead
After rejoining the main branch of the cave, we continued for approximately another ½ mile before we reached the end. Not quite convinced that this really was the end, George wormed his way on through a small opening to explore further.

George was determined to make sure we were indeed at the end of the cave
It really was the end for all practical purposes and George soon came slithering back out to rejoin us for a group photograph before we started back.

George returning from exploring further than the rest of us cared to go
Left to right: Loren Pritzel, Lila Wright, Gordon Bice, George Everman, 
Dolly Yapp, Ellis Price, Virginia Driscoll, Daisy Williams and Kwi Johnson 
– picture taken by a hiker from another group
We had reached our goal, but we still had the three-quarters of a mile trek back to the entrance before us, and we wanted to reach the surface before eating lunch, so without further ado we started back.

The trip back out of the cave was uneventful and we knew that the last of our group was safely out of the cave when George emerged from the opening (below).

We stopped for lunch under the Ponderosas and then headed back home. We took a different route back from the cave and I will describe both below.

George emerged from the cave mouth and we knew that we were all 
accounted for
To travel to the cave we used the directions provided by the Forest Service: “Drive 9 miles north of Flagstaff on US 180 and turn west (left) on FR 245 (at milepost 230). Continue 3 miles to FR171 and turn south 1 mile to where FR 171B turns left a short distance to Lava River Cave.”

On the return trip we took FR 171B back to FR 171 and then followed that road for 7.4 miles before turning left on the frontage road for I-40 at Camp Navajo. We followed this road for about 0.8 miles before taking an overpass over the freeway and then turning onto I-40 heading back to Flagstaff.

1 Lava River Cave (Arizona)
2 See next page for descriptions of ʻAʻā and Pāhoehoe basaltic lava
3 http://en.wikipedia.org/wiki/Lava

4 http://en.wikipedia.org/wiki/Lava