Friday, October 28, 2011

Indian Ruins at Mullican Canyon


On 28 October 2011 nine Skyliners hiked to the Indian Ruins at Mullican Canyon. The below group picture was taken at the ruins.

Left to right: Betty Wolters, Dolly Yapp, George Everman, Ellis Price, Daisy 
Williams, Marvin Alt, Miriam Sterling, Lila Wright and Donna Goodman
We all met at the Safeway parking lot and drove through Cornville to interstate 17.  We then drove north on I-17 to Exit 306 and turned off on Stoneman Lake Road.  The spot where we parked for the hike is seventeen miles from I-17 on mostly dirt roads.  From I-17 we followed Stoneman Lake Road east for 6.4 miles until we came to a T.  At the T we turned right on FR 922 and followed it for about 1.6 miles before making a 90-degree right turn onto FR 644.  We followed FR 644 for 9.3 miles, passing Mullican Place Tank and Three-Jim Tank on the way, before parking just after the road crosses a shallow wash.  The location is at N34043’ 35.84” W111039’ 47.58”.

The topographic map we were using in the GPS showed three weirs, used long ago to measure stream flow, along the course of our travels.  Two of these are located along FR 644, the first at Three-Jim Tank and the second just a short distance down stream from the tank.  The third weir is shown by the map to be located along the wash we followed between FR 644 and Mullican Canyon where the ruins are located.  We never found any sign of the third weir, not even the remains of a foundation and were left to wonder whether the map entry might have been an error.

For those who are curious, a weir can be described as “… a small overflow dam used to alter the flow characteristics of a river or stream. In most cases weirs take the form of a barrier across the river that causes water to pool behind the structure (not unlike a dam), but allows water to flow over the top. Weirs are commonly used to alter the flow regime of the river, prevent flooding, measure discharge and to help render a river navigable.1

After parking we followed the wash downstream, first along the bank, then entering the wash itself when the going become easier there.  It is approximately 0.95 miles from the road to the Indian ruins.  They are located atop an outcropping, separated from the canyon wall proper by an abandoned meander (rincon).  Part of the ruins can be seen directly ahead as you proceed down the side canyon formed by the wash you are in toward its junction with Mullican Canyon. As you approach them look carefully to the north face of the side canyon you are in.  About 100 yards before you reach the ruins look carefully and you will find distinctive Indian drawings located high on the north wall of the wash.

Indian drawing
Indian Drawing
These drawings don’t just jump out at you unless the sun is exactly right; however, they are visible at any time if you look closely.  As for me, I hiked this way twice before I finally noted them.

A section of the Indian ruins can be seen atop the outcropping shown here. 
Note the man-made rock wall running along the periphery
At the foot of the outcropping on which the ruins are located lies a deep pool of water.  The side canyon (or wash) we have been traveling down is at this point almost perfectly parallel to Mullican Canyon.  At one time the stream apparently flowed to the left of the outcropping into Mullican Canyon further downstream.  It has since been diverted by some geological event that allowed it to break through and flow to the right of the outcropping, spilling directly into Mullican Canyon.


Deep pool at the foot of the outcropping containing the Indian ruins 
– overflow from the pool is directly into Mullican Canyon through the 
opening visible to the right
To reach the ruins it is necessary to climb along the face of the canyon, crossing above the pool, and enter the abandoned meander (rincon).  From there it is possible, although difficult, to climb up to the peak of the outcropping where the ruins are located.  In the photograph below hikers are shown navigating the perilous route along the canyon wall toward the meander.

Hikers are shown climbing along the canyon wall above the pool – the 
shoulder of the outcropping containing the ruins is visible to the right 
– the saddle between the canyon wall and the outcropping is the old 
stream course, or “abandoned meander.”
The most direct route on up to the ruins is to climb up the steep, rocky slope as soon as you reach the meander.  A somewhat easier climb is possible a few yards further down the meander; however, undergrowth makes those few yards almost impassable.  Any path you choose is a steep, perilous climb requiring great care to avoid slipping.  But the reward is great once you reach the ruins.

Looking on down Mullican Canyon from the ruins we could see its confluence with Rarick Canyon 0.8 miles to the west.  Later reference to an online map, disclosed that I-17 at the closest point lies just 1.2 miles to the northwest across Mullican and Rarick Canyons from the ruins.  But, as the saying goes, you can’t get there from here.
It was still rather early for lunch and we had stopped for a snack on the way down the wash, so I wasn’t very hungry.  While the rest of the group looked around the ruins and ate lunch, I seized the opportunity for a good nap.  I was sound asleep when George awakened me.

Before starting back we paused for the group photograph shown at the beginning of this report.  George took the shot using my camera on time delay.  Then after carefully climbing back down the steep, rocky slope to the old meander and making our way along the canyon wall above the pool, we started rock hopping our way back up the wash toward our waiting vehicles.

Climbing back along the canyon wall above the pool on our way up the 
wash, shown directly ahead – photograph by George on a previous hike
Having noting that FR 644, the road we had driven in on, continued along the hill above and generally parallel to the wash we were following, we decided to climb out of the wash at the first good opportunity and make our way up the slope to the road.  It would appear to be a much easier hike than continuing along the rocky bed of the wash, and so it was.  Using a GPS to find the most direct route we soon arrived at the road about half a mile from our cars.

Although we were parked to the east of where we entered the road (FR 644) we saw some artifacts about 200 yards in the other direction and went that way to investigate.  What we found were the remains of an old corral and another weir located in a wash at the end of FR 644.  The below photograph was taken from just upstream of the weir looking over it into the chasm the stream had formed on its way to Mullican Canyon.

Photograph taken from the bed of the wash located at the end of FR 644. 
The walkway runs along the top of the weir. From there the stream 
drops sharply into a deep chasm on its way to the canyon below
Examining the weir: Marvin alt (partial at top), Dolly Yapp, Lila Wright 
and George Everman
The total hiking distance was only about 1.9 miles.  However, that is somewhat deceptive because the going is rough, except for the part of the return trip that was along FR 644.  The wash is rocky and requires stepping carefully all the way to avoid sprained ankles and falls, several places require climbing over or around steep ledges in the streambed, the climb along the canyon wall above the pool is quite perilous and the final climb to the ruins is steep and rocky.

This is a moderately difficult hike overall with a few very difficult areas; it is not for those with weak ankles or those who do not like a little rock climbing.  Some of the rough hiking in the streambed can be avoided by parking at the spot where we rejoined FR 644 at N340 43’29.92”; N1110 40’15.07” and hiking north to join the wash closer to the ruins.

An Alternative Hike to the Indian Ruins

A good alternative to parking where we did for this hike is to park instead at 3-Jim Tank. Weir Number 1 is located there in the same wash that we followed on this hike to reach the ruins at its juncture with Mullican Canyon. It is just farther upstream and the hike is thus a bit longer. As compensation for the longer hike you can investigate the remains of the extensive water measuring system once installed along the wash. Weir Number 1 is, as noted previously in this report, only the first of three weirs once in place along the wash. Number 2 is between 3-Jim Tank and the place where we parked for today's hike; A Weir Number 3 was apparently once located between there and Mullican Canyon, but no longer exists. The weir featured in today's hike report is located in an entirely different wash that empties into Mullican Canyon at a different point. Some of the artifacts and sites to be seen along this alternative hike to the ruins are shown in these four photographs (below).

Weir Number 1
A well-constructed hunter's blind located near Weir Number 1
In the wash below Weir Number 1, approaching Weir Number 2
Weir Number 2
As previously noted, Weir Number 3 no longer exists, and we were left wondering if it ever did.
The included map (below) shows the immediate area of this hike. Interstate 17 is visible running diagonally across the upper left corner. The dirt road running between I-17 and Rarick Canyon is Beaver Creek Road. The blue line on the map is the route we took from our cars down the wash to the ruins at Mullican Canyon. The yellow line shows our return route including the side trip to the unnamed weir. The green line shows the last bit of our drive in from I-17.

To hike to the ruins by way of weirs 1 and 2, just park at 3-Jim Tank and follow the blue track shown on the included map down the wash.


1 http://en.wikipedia.org/wiki/Weir

Saturday, October 1, 2011

Lava River Cave


Nine Skyliner hikers visited Lava river Cave near Flagstaff on Saturday, 01 October 2011. We met at the Cottonwood Safeway Parking lot at 0700 and car pooled from there, traveling to Flagstaff via Hwy 89A and stopping at Coco’s for breakfast.

The following information is excerpted from Wikipedia:1

Lava River Cave is a lava tube cave in northern Arizona's Coconino National Forest. At approximately 0.75-mile (1.21 km) long, it is the longest cave of this kind known in Arizona. The cave was discovered by some lumbermen in 1915. The cave has also historically been referred to as "Government Cave" due to its location on the eastern edge of Government Prairie and southeast of Government Peak. Today, Lava River Cave is freely accessible to the general public.
Geologists believe the cave was formed sometime between 650,000 and 700,000 years ago when molten lava erupted from a volcanic vent in nearby Hart Prairie. The top, sides and bottom of the flow cooled and solidified, while lava in the middle flowed out, leaving a hollow space to form the cave. Examples of both ʻAʻā and Pāhoehoe basaltic lava can be seen in the cave.2

The cave is mostly dry, but due to the temperature change, there is a lot of condensation on the walls, ceiling and floor near the entrance, which makes it slippery. Temperatures inside are around 40°F (5°C) during the summer, and it is not uncommon for some of the rocks to be covered with ice. The cave can range in height from 30 feet (9.1 m) to only 2 to 3 feet (0.61 to 0.91 m). There are no light sources inside. It is recommended visitors have sturdy hiking boots, warm clothing, and multiple sources of light.

Litter and graffiti have been problems since the late 1960s. A major restoration effort was organized in May 1991. Almost all the litter was packed out and much of the graffiti removed at that time. Dogs should not be taken in the cave since there are only limited and very slow biological processes to render their urine and feces unobjectionable.

The entrance to the cave is around 14 miles (23 km) north of Flagstaff, Arizona. Being in Coconino National Forest, the cave is managed by the United States Forest Service. While the cave is open year round, the dirt roads which lead there may be impassable to cars in winter months or during wet weather conditions. There are no entrance or use fees.

I found the following descriptions for Lava types ʻAʻā and Pāhoehoe:

ʻAʻā (also spelled aa, aʻa, ʻaʻa, and a-aa; pronounced /ˈɑː.ɑː/ or /ˈɑːʔɑː/, from Hawaiian [ʔəˈʔaː][6] meaning "stony rough lava", but also to "burn" or "blaze") is one of three basic types of flow lava. ʻAʻā is basaltic lava characterized by a rough or rubbly surface composed of broken lava blocks called clinker.3

Pāhoehoe (also spelled pahoehoe, pronounced /pəˈhoʊ.iːˈhoʊ.iː/, from Hawaiian [paːˈhoweˈhowe],[8] meaning "smooth, unbroken lava") is basaltic lava that has a smooth, billowy, undulating, or ropy surface. These surface features are due to the movement of very fluid lava under a congealing surface crust.4

George had left Wally the tripod in the truck and there was no good place to set the camera for a time delay shot, so George, the photographer, is not in this group shot.

Left to right: Loren Pritzel, Virginia Driscoll, Ellis Price, Gordon Bice, 
Kwi Johnson (front row), Daisy Williams, Dolly Yapp (front row) 
and Lila Wright – photograph by George
Two signs were posted providing information about the cave. These are shown on the next page.

General information
Interpretive sign
Upon entering the cave, the first fifty yards or so slope steeply down and the way is very rocky. It would be very rough going in the winter when ice could be expected near the cave opening. As it were we found that the rocks were wet and slippery as we descended. However, we were soon past the steepest, rockiest part and the going was somewhat easier.

Gordon was leading the way and George was bringing up the rear to make sure no one was left behind. I was following close behind Gordon and whenever we noted that we could not count seven lights behind us we stopped and waited for the rest of the party to catch up. The below photograph was taken during one such stop and shows George and Daisy appearing out of the darkness. Until they were close enough to be illuminated by our lights all we could see was their flashlights, like two large fireflies drifting in the breeze.

Left to right: Dolly, Daisy and George (appearing out of the darkness) 
and Kwi
Somewhere along the way we came to a section with a relatively smooth floor that provided for somewhat easier walking. The floor surface here appeared similar to a very, very rough sidewalk with oversize gravel, or pre-hardened lumps of concrete, imbedded in the surface. I learned later that it was probably type ʻAʻā (meaning "stony rough lava", but also to "burn" or "blaze") lava, one of three basic types of flow lava. I took two photographs of the floor, one also showing some sort of fungus (or mold) growth.
Section of cave floor showing ʻAʻā lave (I think) 
Section of cave floor showing ʻAʻā lave (I think) along with mold 
– Gordon’s hand is seen at right
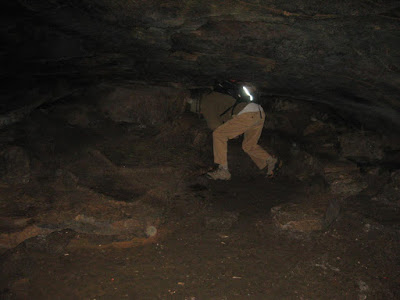
About ¼ mile from the entrance the cave splits, a smaller branch leading off to the right and reconnecting with the main branch a short distance ahead. We decided to take the smaller branch on the way in and then follow the larger branch on the return trip. Gordon is shown below entering a low section; about here I was wishing I had brought knee pads.

Gordon entering a section of the side branch with a very low overhead
After rejoining the main branch of the cave, we continued for approximately another ½ mile before we reached the end. Not quite convinced that this really was the end, George wormed his way on through a small opening to explore further.

George was determined to make sure we were indeed at the end of the cave
It really was the end for all practical purposes and George soon came slithering back out to rejoin us for a group photograph before we started back.

George returning from exploring further than the rest of us cared to go
Left to right: Loren Pritzel, Lila Wright, Gordon Bice, George Everman, 
Dolly Yapp, Ellis Price, Virginia Driscoll, Daisy Williams and Kwi Johnson 
– picture taken by a hiker from another group
We had reached our goal, but we still had the three-quarters of a mile trek back to the entrance before us, and we wanted to reach the surface before eating lunch, so without further ado we started back.

The trip back out of the cave was uneventful and we knew that the last of our group was safely out of the cave when George emerged from the opening (below).

We stopped for lunch under the Ponderosas and then headed back home. We took a different route back from the cave and I will describe both below.

George emerged from the cave mouth and we knew that we were all 
accounted for
To travel to the cave we used the directions provided by the Forest Service: “Drive 9 miles north of Flagstaff on US 180 and turn west (left) on FR 245 (at milepost 230). Continue 3 miles to FR171 and turn south 1 mile to where FR 171B turns left a short distance to Lava River Cave.”

On the return trip we took FR 171B back to FR 171 and then followed that road for 7.4 miles before turning left on the frontage road for I-40 at Camp Navajo. We followed this road for about 0.8 miles before taking an overpass over the freeway and then turning onto I-40 heading back to Flagstaff.

1 Lava River Cave (Arizona)
2 See next page for descriptions of ʻAʻā and Pāhoehoe basaltic lava
3 http://en.wikipedia.org/wiki/Lava

4 http://en.wikipedia.org/wiki/Lava

Saturday, September 24, 2011

Grandmaw’s Cave – Harding/Cookstove


The Skyliner’s have a hike to Grandmaw’s Cave scheduled for 22 September 2011, and our leader Lila did not wish to attempt that hike with knowing exactly how to get there. We had already tried twice without being able to locate the cave, even though we knew we were in the immediate vicinity. Thus it was that six stubborn Skyliners set out on yet another scouting hike in a last ditch effort to locate the cave before the hiking season begins in October.

The following group photograph, taken in front of the cave, demonstrates our success on this attempt.

Left to right: George Everman, Lila Wright, John McInerney, Akemi 
Tomioka, Gordon Bice and the author 
– photograph by George using the authors camera
Lila, John, Gordon and Ellis met at the Safeway parking lot in Cottonwood at 0700. Kwi was missing, not having received word of the scheduled hike. We drove to Harding Spring Trailhead at the entrance to Cave Springs Campground on Hwy 89A where we were met by George and Akemi. A parking lot is provided just to the right of the entrance to the campground.
We donned our packs, walked across Hwy 89A and headed up Harding Springs Trail; the trailhead is marked by a rusty metal sign located very near the sign for Cave Springs Campground.

Harding Springs Trailhead sign and Cave springs Campground sign
We headed up the trail at a reasonable pace so as not to tire ourselves out too early in the hike. Harding Springs Trail is fairly steep, climbing over 900 feet in just 0.7 miles; however, it is well developed and a reasonably easy climb if you pace yourself.

An old post marks the point where the trail tops out on the rim; it probably once hosted a sign announcing the Harding Springs Trailhead.

The old post (right) marks the start/end of Harding Trail at the rim. From here a trail leads off to the southwest for about 100 yards to an excellent overview point from which you can see back down Oak Creek Canyon and across the way to the cliffs on the other side. A second trail (Telephone to Cookstove) leads to the northeast along the rim to connect with Cookstove Trail 1.4 miles away. Finally, a third trail (also Telephone to Cookstove) leads to the southeast. One takes this trail for approximately 0.3 miles before turning off to the right, heading almost directly south (about 140 degrees true) to cross a wash; emerging on the south side of the wash, the trail (indistinct but marked by cairns along the way continues for about another 0.1 miles (you should never be out of sight of a cairn) before crossing another wash. It then turns to the northwest (about 292 degrees true) for around another 0.3 miles to the very tip of the ridge you are on. At this point you are just about on top of Grandmaw’s Cave; however, a hard scramble down the face of the cliff along a steep, barely discernible trail to the cave opening awaits you. (NOTE: these interim distances are approximate)

The cave itself is quite large, running approximately 100 yards back into the mountain ridge along which we had traveled. The following picture was taken as the photographer approached the cave.

Approaching the cave – photograph by George
Just inside the cave mouth is located a geocache, securely chained to the wall. The next two photographs show the cache and George placing a golf ball in the box. Akemi left the paper swan; not being into geocaching, I left nothing and took nothing.

Geocache box showing, among other items, Akemi’s paper swan and 
George’s golf ball - by George
George placing a golf ball in the Grandmaw’s Cave geocache
The end of Grandmaw’s Cave – photograph by George
Looking out from inside the cave – Gordon, Lila and John are shown
The following two pictures (below) were taken as we climbed back up the cliff from the cave.

Akemi and John climbing back up the trail to the top of the ridge 
after our visit to Grandmaw’s Cave
Lila and Gordon climbing up the cliff from Grandmaw’s Cave
Back on top of the ridge above Grandmaw’s Cave, I took a photograph of a tree that grows from approximately just above the cave opening and then found another one taken on 17 August 2011 showing the same tree. We had almost found the cave on that trip.

Photograph showing tree growing just above the mouth 
of Grandmaw’s Cave
Taken 17 August 2011 – George appears to be pointing at the tree 
growing above Grandmaw’s Cave
As we continued our way up the trail along the ridge from the point above Grandmaw’s cave, I took several photographs looking back just to remind myself what the trail looked like on the way to the cave.

The trail to the ridge point above the cave leads close against the 
cliff wall shown here
The going is steep and rocky in places
Fortunately, the rough part of the trail leading down to the point of the ridge above Grandmaw’s Cave is only about 0.1 miles. The rest of the way between there and the intersection of Harding Springs Trail and Telephone to Cookstove Trail is an easy hike – just watch for cairns and, if possible, load the Garmin gdb file sent along with this report in a GPS and follow it. That will help to avoid a lot of wondering as to whether you have taken a wrong turn.

We arrived back at the top of Harding Springs trail in short order and then continued the 100 odd yards out to the viewpoint to eat lunch.

After lunch we took the Telephone to Cookstove Trail north along the rim for about 1.4 miles to its intersection with Cookstove Trail.

The blaze on the tree shown here marks the end of Cookstove Trail 
at Telephone to Cookstove Trail
The Arizona topo map I am using in my GPS shows Telephone to Cookstove Trail running on north along the rim for about 0.3 miles, I think just to a viewpoint, before it ends.

Cookstove Trail seemed to me to be steeper than Harding Springs Trail had been. However, when I downloaded the GPS file and examined it in the computer, I found that we had descended about 200 feet less than we had ascended on Harding Springs Trail. The recorded distance was exactly the same – 0.7 miles.

The Cookstove Trailhead at Hwy 89A is, like the Harding Springs Trailhead, marked with a rusty metal sign (below left). A drinking water station (below right) is located directly across the highway from the trailhead and just a few yards from the north exit from Pine Flats Campground. The water was most refreshing and we all paused for a drink and a short rest before continuing on.

Trailhead sign
Water station
We were about 1.1 miles north along Hwy 89A from where we had parked at the Harding Springs Trailhead, and because there is hardly enough room to walk alongside Hwy 89A in places, we took a slightly longer (1.2 miles) route: we hiked through Pine Flat Campground to emerge at the south exit, walked along Hwy 89A for about 100 yards and then entered the Pine Flats community, crossed Oak Creek on a low concrete bridge and continued straight on Bear Howard Road which soon became a dirt road.

About 0.1 miles after leaving Hwy 89A we turned left (south) onto a trail (apparently unnamed) that starts in the edge of a private driveway and follows a power line across a saddle behind a hump that separates it from Hwy 89A. Our trail then crossed back to the east side of Oak Creek about 0.3 miles from Bear Howard Road. After crossing back over the creek, we continued straight toward the highway for about 40 yards, turned right onto another trail and followed it for about 50 yards before turning left on still another trail which we followed only 30 yards or so before turning right on a straight, open trail which led us directly to our parked vehicles about 0.1 miles ahead.

Akemi is headed back to Japan on the 27th and this was her last hike with us this year, so while still at the Grandmaw’s Cave we took the time to wish her well and to toast our success in finally finding the cave with a spot of green tea.

Toasting our success in finally finding Grandmaw’s Cave with 
a spot of Akemi’s green tea
With the extra trip to eat lunch at the viewpoint and the searching we did to find the Cave, my GPS indicated that we hiked 5.2 miles. The highest elevation was 6335 feet and the total ascent was 1828 feet.

Some distances:

Harding Springs Trail: 0.7 miles (red).
Top of Harding Springs Trail to Grandmaw’s Cave: 1.0 mile (magenta).
Harding Springs Trail to Cookstove rail on rim: 1.4 miles (green).
Cookstove Trail: 0.7 miles (red).
Cookstove Trail to Harding Springs Trail along Oak Creek: 1.2 miles (dark magenta).
Lookout Point at top of Harding Spring Trail: 0.1 miles (white).

Note: The sum of these separate tracks differ slightly from the total due to rounding error.

The included map (below) shows the route we took for this hike.


Saturday, August 13, 2011

Snowbowl to Schultz Tank via Humphreys and Weatherford Trails


On Saturday, 13 August 2011, four hikers from Cottonwood and Sedona, along with a visitor from Japan, stowed raingear in our packs and headed out to hike from the Snowbowl to Schultz Tank. We were hoping for the best even though the weather report gave a 50% chance of thundershowers. We had previously hiked Humphreys Trail from Snowbowl to the Peak and Weatherford Trail from Schultz Tank to Doyle Saddle and were anxious to do the entire route from Snowbowl to Schultz Tank.

Kwi Johnson, Gordon Bice and I left the Safeway parking lot in Cottonwood at 0500 and drove to Flagstaff where we met George Everman and Akemi Tomioka (our very welcome visitor from Japan) at Denny’s. Traveling in two vehicles we continued on into Flagstaff, took US-180 W and followed it about 3.2 miles before turning right on Schultz Pass Road. We followed Schultz Pass Road (being careful to turn left about 0.3 miles from US 180) approximately 5.2 miles to the trailhead parking lot at Schultz Tank. The turnoff to the parking lot is on the right (south) side of the road about 0.2 miles past the sign for Schultz Pass. A toilet is provided at the parking lot. Parking one vehicle there, we all returned to US 180 in the other vehicle and followed it for another 3.8 miles before turning right onto Snowbowl Road. After another 6.2 miles on this road we arrived at the parking lot for Humphreys Trail at the Snowbowl.

The trail leads across a meadow and enters the Coconino National Forest about half a mile ahead. Soon after entering the forest the trail begins to climb sharply. Just about a mile from the trailhead, we entered the Kachina Peaks Wilderness. We stopped there for a short rest before continuing on our way. I had decided that we would stop for a rest at one-mile intervals during the steep (2540 foot ascent), winding, 3.8-mile climb from Snowbowl to Humphreys-Agassiz Saddlei (otherwise known, at least to Humphreys Hikers, as the “first gap”). We spotted several great looking mushrooms along the trail (two pictures by George below).

Mushroom – photo by George
Mushrooms – photo by George
Refreshed by the occasional break we were soon approaching the treeline. The sign says the elevation here is 11400 feet and prohibits off trail hiking beyond this point.

From front to rear: Ellis Price, Gordon Bice, Kwi Johnson and George 
Everman – photograph by Akemi Tomioka
When we reached Humphreys-Agassiz Saddle, having already climbed 2540 feet from Snowbowl, we still had 300 feet to go feet to go before to reach the high point of our hike. It was very windy in the saddle and being damp with perspiration we were quite chilly. We had, anyway, traveled a bit less than a mile since our last break, so we pushed on, stopping for our fourth break on the southwest slope of the ridge between Agassiz and Humphreys. From there we had great views of the ski area on the slope of Agassiz, Bill Williams Mountain to the southwest and Sitgreaves Mountain to the west. We were just a few feet below the high point of our hike where we would again be exposed to the wind as we crossed a high ridge on the north slope of Agassiz at an elevation of 12000 feet. From there we would begin the long, almost 4000 foot, descent to Schultz Tank, hiking down the eastern slope of Agassiz and across the north slope of Fremont, passing through Doyle Saddle and continuing down the winding mountain trail to our destination.

After a short time to rest and enjoy the view from our sheltered spot on the slope of Agassiz, we again braved the wind and climbed the few remaining feet to cross over the ridge and begin our descent. From here, except for a short easy climb to cross through Doyle Saddle, the way would all be downhill along an old roadway used by motorists in the early part of the last century to access the peaks.

We crossed the ridge quickly to get out of the cold wind on top and started down the eastern slope. Along the way we had great views down into the Inner Basin. And we saw some gorgeous flowers growing in the fractures of rock ledges alongside the trail, which George lagged behind to photograph for his collection. (left).  George identified the flowers for me as yellow coralbells or Heuchera.

Just after we started down the slope along Agassiz, Akemi climbed up on a rock formation for an even better view down into the inner basin. In the below photograph she is shown scrambling back down to the trail.

Akemi Tomioka descending from a rock formation alongside 
Weatherford Trail at the head of the Inner Basin
Someone asked how the Inner Basin was formed. The quick answer is, of course, by volcanic action. However, the US Forest Service provides a more informative, but still very brief, narrative in the Coconino National Forest trail guide for the Inner Basin Trail #29. The following excerpt from that guide is provided for general information:

The San Francisco Peaks are actually the remains of an extinct volcano. Millions of years ago this great mountain was shattered by an explosion similar to the one that devastated Washington's Mt. Saint Helens in 1980. Inside the now quiet caldera a lush alpine environment has blurred evidence of that cataclysmic event.

The trail into the heart of the ancient volcano begins in beautiful Lockett Meadow. From this island of emerald ringed with aspens and high peaks it follows a primitive road into the mountain's now quiet Inner Basin and then connects to the Weatherford trail. Here, extensive stands of aspens cover the steep slopes of the old caldera coloring them solid gold in early fall. In spring and summer, wildflowers add a sprinkling of blue, red and yellow. From the basin's rims, avalanche tracks streak down the talus slopes and remnants of old lava flows bear witness to the mountain's cataclysmic heritage.1

We lingered along the trail for the views and I distracted Gordon from looking down into the basin long enough to snap the following shot.

Gordon Bice with the Inner Basin in the background
We continued down the slope of Agassiz to Fremont Saddle.ii Labeled as Doyle Saddle on some maps, it is located 1.6 miles along Weatherford Trail from Humphreys-Agassiz Saddle, just about equidistant between Agassiz and Fremont peaks. We continued on past the saddle to cross along the north slope of Fremont on our way to Doyle Saddleiii (labeled as Fremont Saddle on some maps). About 0.9 miles further along the trail (some 2.5 miles from Humphreys-Agassiz Saddle) we passed the junction with the Inner Basin Trail. The trail along here passes through a heavily forested area and the hiking is pleasant, mostly level with just a slight upslope as one approaches Doyle Saddle. It was close to 1330 when we arrived at Doyle Saddle and we had been on the trail since 0805. It was certainly time to stop for lunch and this was an excellent spot, about midway between Fremont and Doyle peaks, still with a view of the Inner Basin from one side of the saddle and a view on down the mountain toward Flagstaff from the other.


After a quick lunch, Gordon and I took a nap while the others just rested and admired the view. Then we picked up our packs and headed on down the mountain toward Schultz Tank; we still had something like 6.5 miles (trail signs indicate 6 miles, but I am not convinced) to go.

Lunch at Doyle Saddle – Left to right: Gordon Bice, Ellis Price (sleeping), 
Akemi Tomioka, George Everman and Kwi Johnson 
– by George Everman with time delay
Shortly after leaving the saddle we stopped to look at the wreck of an old yellow car that had tumbled down the mountain from the road. The wreck, still bright yellow, shows little evidence of rust or damage from the elements. However, it must have been there for some time as the road appears to have been closed to motorized vehicles for several years.

Old wrecked vehicle just below Doyle Saddle – by George Everman
The flowers alongside the trail in this area were spectacular. Some of these are shown in the following photograph taken by George.

Flowers alongside the trail below Doyle Saddle – by George Everman
My favorite spot along this trail is Aspen Spring, located around four miles below the saddle, and I was determined to make that our next rest stop. We were heading downhill now and the “one-mile between rest stops” rule was long forgotten, so we wound our way down the heavily forested mountain slope at a good pace until we reached the lush, aspen-bordered meadow signaling our arrival at Aspen Spring.

We took a good long break at the edge of the aspen forest with a great view across the open grassy meadow spread out below the trail. We then had George take a group photograph using the aspens for a background before continuing our hike.

Left to right: George Everman, Akemi Tomioka, Ellis Price, Kwi Johnson 
and Gordon Bice – by George Everman with time delay
Somewhat reluctantly leaving our peaceful rest area, we gathered ourselves up and began the last two miles of our hike. About 0.3 miles from Aspen Spring we left the Kachina Peaks Wilderness and then after another 0.2 miles passed Dead Elk Fork (so called because we once found a dead elk there) where Kachina Trail leads off to the west, ending after five miles at the Snowbowl where we started. Our trail, however, continued on down the mountain to end at Schultz Tank, about 1.6 miles away and we pressed on.

We arrived at Schultz Tank at about 1725, having hiked around 13.9 miles, climbed 2735 feet and descended 3985 feet since leaving Snowbowl at 0805.

Below are shown a couple of miscellaneous photographs taken along the way.

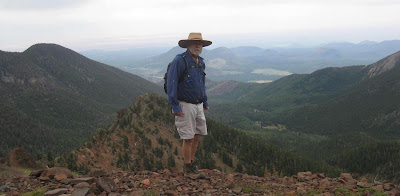
The author – near 12000 feet elevation on Weatherford Trail 
overlooking the Inner Basin – by Akemi with my camera
Akemi Tomioka - near 12000 feet elevation on Weatherford Trail 
overlooking the Inner Basin
The one-way distance for this hike was 14.6 miles. The highest elevation was 12023 feet, the total ascent was 3209 feet and the total descent was 4023 feet.

Our GPS track is shown on the included map (below).


1 From: http://www.fs.fed.us/r3/coconino/recreation/peaks/inner-basin-tr.shtml
i This saddle apparently does not have an official name. Hikers on Humphreys Trail just refer to it as the “first gap” because it is the first gap on the way to Humphreys Peak.

ii Fremont Saddle, according to a USFS map published in 2000, is located between Fremont Peak and Agassiz Peak. Be aware, however, that on the USGS overlay map for Google Earth, Fremont Saddle is labeled as Doyle Saddle. Likewise, Doyle Saddle, located on the USFS map between Fremont Peak and Doyle Peak, is labeled as Fremont Saddle on the USGS map.


iii Ibid